Mame Arcade Machine - Phase 2
September 2003
Page 1: Mame Arcade Machine - Phase 1
Page 2: Mame Arcade Machine - Phase 2
Control Interface - Keyboard Hack
This is one of the more difficult parts of the Mame Arcade Project. Many people debate how to interface the controls to the PC and decide to plunk down $65usd for a I-Pac or similar device. This basically allows them to hook up the controls quickley and easily. I on the other hand have some electronics experience, I'm not afraid to mess up and I didn't want to spend $100cdn. This project is supposed to be a learning experience, so I decided to try the dreaded keyboard hack. This is where you take a standard PS2 keyboard, open it up, figure it out and connect wires like crazy.
First Attempt:
Apparently there are 2 types of PS2 keyboards. The kind with 1 small controller
IC and another with a very large, multi chip controller IC. I didn't
know this when I started. I opened up a PS2 keybaord and started soldering
directly to the metal keyboad pads (see below). In the picture only about
8 are soldered, but before I realized my mistake, 40 were soldered.
Second Attempt:
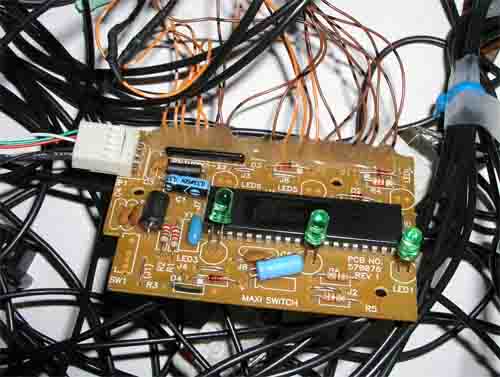
The kind you want to use, is the kind with 1 IC. Basically how it works
is there are 2 sets of wires. On my IC there was a set of 8 and a set
of 14. When you touch 1a with 1b, for example W appears on the screen.
If you touch 3a with 11b, M appears on the screen. There is a total of
8x14=112 inputs, but the standard keyboard does not use them all. To
do the keyboard hack, you need to painstakingly map every possible combination
by hand. My sister gave me a hand, so it didn't take too long. I soldered
8+14=22 wires to the chip.
 |
Hint: After you solder wires, if you're afraid they might break off, use hot glue to keep them in place. Works every time.
On a piece of paper I systematically mapped out the inputs of the keyboard IC by pressing 1a with 1b then 1a, 2b - 1a, 3b...112 times. Pic coming soon. A great peice of software that shows you which key is being pressed is KeyScan v0.9. If you're going to do a keyboard hack, this software makes it easy. If you're in notepad - how are you going to know if the HOME key is pressed?
Next, you need to keep all of the wires organized. For a mame cabinet, you're going to have 4 directions for each joystick (8 wires / joystick), 6 buttons per player (12 wires / player) and a bunch of control buttons like Escape, Enter, Tab, F3 (reset), P (pause), Coin1 and Coin2, 2 wires each for both of those. In all, I had about 75 wires to deal with. With that many wires, you need a system to keep them organised. I found some screw clamps about bought 6 of them (50c ea) and glued them to a cardboard box. Using the keyboard map I created earlier, I attached 1 wire from the keyboard IC to each wire clamp. So, if I wanted the Esc button, I would wire 1 side of the swithch to 3a and the other side to 5b. Despite it's messy appearance, it works quite well and is fairly well organized. Without some sort of organization - you wouldn't be able to do it at all.
 |
 |
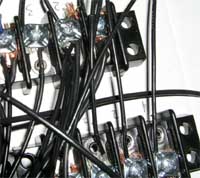 |
Organization is key in doing a keyboard hack. Clamps 1-8(A) are numbered on the bottom and 1-14(B) are labelled on the top.
Control Panel
I knew that I would have to replace the control panel to suit my needs. The control panel in place had 2 bad joysticks and only 3 buttons / player. I cut a piece of metal at school to replace it, filed it down to size and drilled 14 1&1-1/8" holes with a wood space bit =) using a neighbour's drill press. I drilled right through the aluminum and it turned out pretty well.
I had ordered some miscelanous buttons and joystick through ebay and I'm currently trying to assemble 2 descent joysticks to use. Thanks to Joff Brown, the man who bought my Space Invaders - I now have all of the buttons I need.
Monitor
The cabinet was a working SF2 cabinet when I bought it. He had an identical cabinet with a blown monitor that I wasn't interested in because of the dead monitor. About a month after having my cabinet, the Electrohome GO7's flyback transformer (most dangerous part of the monitor) blew. There was a great deal of smell and smoke. What's left is a flyback with black stuff oozing out the side (see below).
|
 |
Busted Flyback transformer on 19" Electrohome GO7 arcade monitor. |
I was then faced with the choice of either repairing the arcade monitor ($28US + Shipping) with which I'd already been having resolution problems with or of replacing it with a monitor of similar size. 21" computer monitors new are over $300. On ebay, I found a 20" Mitsubishi in Marham, Ontario up for auction. I bid and won it for $51cdn. Shipping would be around $100US, so I decided to pick it up =). On July 23 '03 (the day I got my drivers licsence: Woot!) we stopped in Marham on the way back from Orangeville to pick up the monitor. The store was FILLED from Top to bottom and down the hall and every room was pilled high with monitors. He had to move some out of the way to be able to walk down the hall. The problem with this monitor is that it only had BNC connections, no VGA. The man in the store tried to sell me a cable for $25, I've seen them locally for $35. I ordered on on ebay for $4US.
|
BNC Monitor Connections |
- First step: take off monitor casing and learn how to discharge a monitor.
- Second step: Cut and elongate 50 potentially HV monitor wires so that the chasis will sit on the shelf.
Wire Connections
Solder and Crimp
When working with arcade machines, there are 2 types of connections that
you can use. Solder and crimp. Solder are more permanent and won't come
off easily. Crimp can be attached and removed easily from a component.
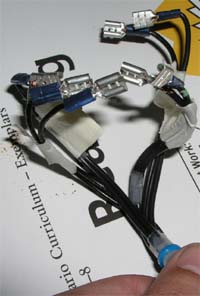
I chose to wire the joysticks with crimp connections, to leave the possibility
that I may change them in the future and I decided to solder all of the
button connections because I'm fairly certain they will be permanent.
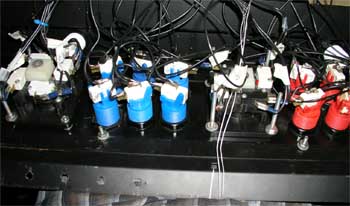
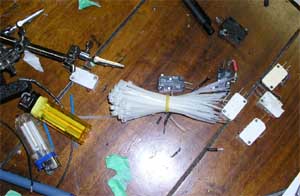
The microswitches (middle pic) fit into the buttons, and the crimp connections fit nicely onto microswitches in the joysticks.
Tools of the Trade
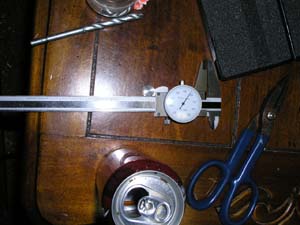
Some tools I used: drill, spade bit (for button holes), vernier, file, soldering iron, extra clamp hands, pliers, screwdrivers, lighters, shrink tube, wire cutters, wire ties.
 |
 |
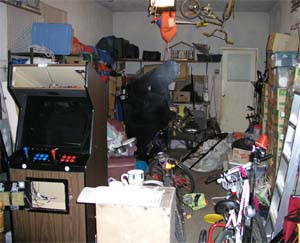 |
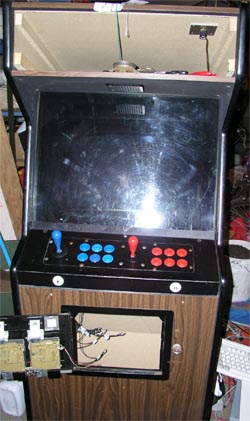
Against my better judgement, I'm putting up a picture of my working conditions - my garage. It's probably mostly my fault it's that messy anyway. See the 2nd machine in the back? The joysticks came from there and my floro light will come from there. I'll post more info about that soon.
Current Status
Things Left To Do
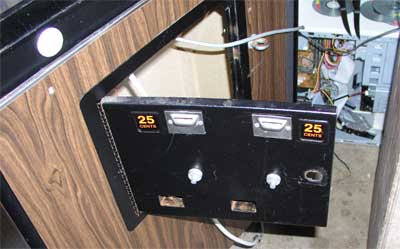 |
Install a lock into the coin door and rig up lights behind the 25c signs to make them glow. |
Marquee: |
This is where the marquee will go. I've obtained some cheap Plexiglass from KW Surplus and will order a custom marquee from EMDKAY. I'll put a floroescent light behind it and it'll look great. Update: Marquee design underway and I've got the floro for my marquee. I haven't checked to see if it works, but assuming it does I'll transfer it from the 2nd machine in my garage to my mame machine. |
Audio - No Pic |
Need to install a stereo into the machine to applify output from the computer's sound card. I plan to install 2 speakers near the bottom. Currently there is only 1 speaker in the marquee section. Update: Have bought the connections and speaker wire, need to solder connections and install speakers. |
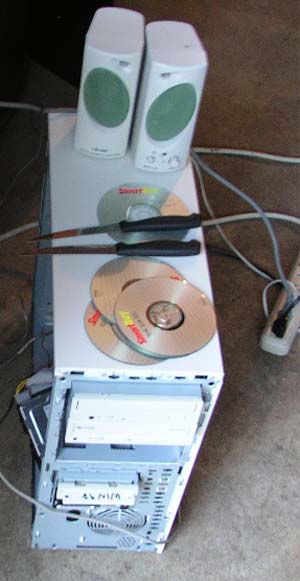
| This is a PIII 525Mhz PC that is currently out beside the arcade machine. I have an unused Duron 850 computer (bought for this project) that I will be installing directly into the arcade machine without a case. Update: Have prospect of getting AMD XP2000+ CPU - powerful enough to run ALL the games I want to run. | |
 |
Change the way the monitor is mounted. Right now, even with the chasis removed, it still sticks out the back of the cabinet a bit. The old monitor was at a ridiculously low angle so that it would fit in. I'll have to move the mounting bracket to get it in. Update: Monitor is in closer to the correct position. I'm going to make it about 80degrees and build an extension for the back of the cabinet so that it will fit. |
Summary
I was hoping to have this project done before the summer was over, that didn't work out as planned. Everything takes longer than you think it will, but now that the control panel is hooked up I can play games =). I will post another update as soon as another major feat of engineering is accomplished.
Page 1: Mame Arcade Machine - Phase 1
Page 2: Mame Arcade Machine - Phase 2


